Category Archives: Tapas and nibbles

All Hail The Great British Pea

We might not be able to grow peaches, aubergines, watermelons or mangoes, but in Britain we do have the perfect climate for peas. As a child I used to love the early summer when you could hide away in the vegetable patch scoffing fresh peas straight from the pod, I still love them raw in a salad, and the fresh pea shoots too. Britain produces 160,000 tons of frozen peas each year and there are certain dishes such as shepherd’s pie that I couldn’t contemplate eating without a pile of barely-cooked petit pois and a hint of fresh mint. But today I’m talking dried peas, the rather unglamorous forefathers of the ubiquitous green pea.

It’s easy to forget that historically, peas were grown to be dried, stored and eaten at a later date. “Pease” were a British staple from the Middle Ages right through to the mid 20th century. You only have to think back to the old nursery rhyme to realise that dried peas were once a key source of protein in our diets, pushed aside in more recent times by meat.

Pease pudding hot,  Pease Pudding cold
Pease pudding in the pot nine-days old

Today with ever-growing sustainability, animal welfare, health and obesity concerns many of us are looking towards a more plant-based diet and so I say “All Hail the Great British Pea”.

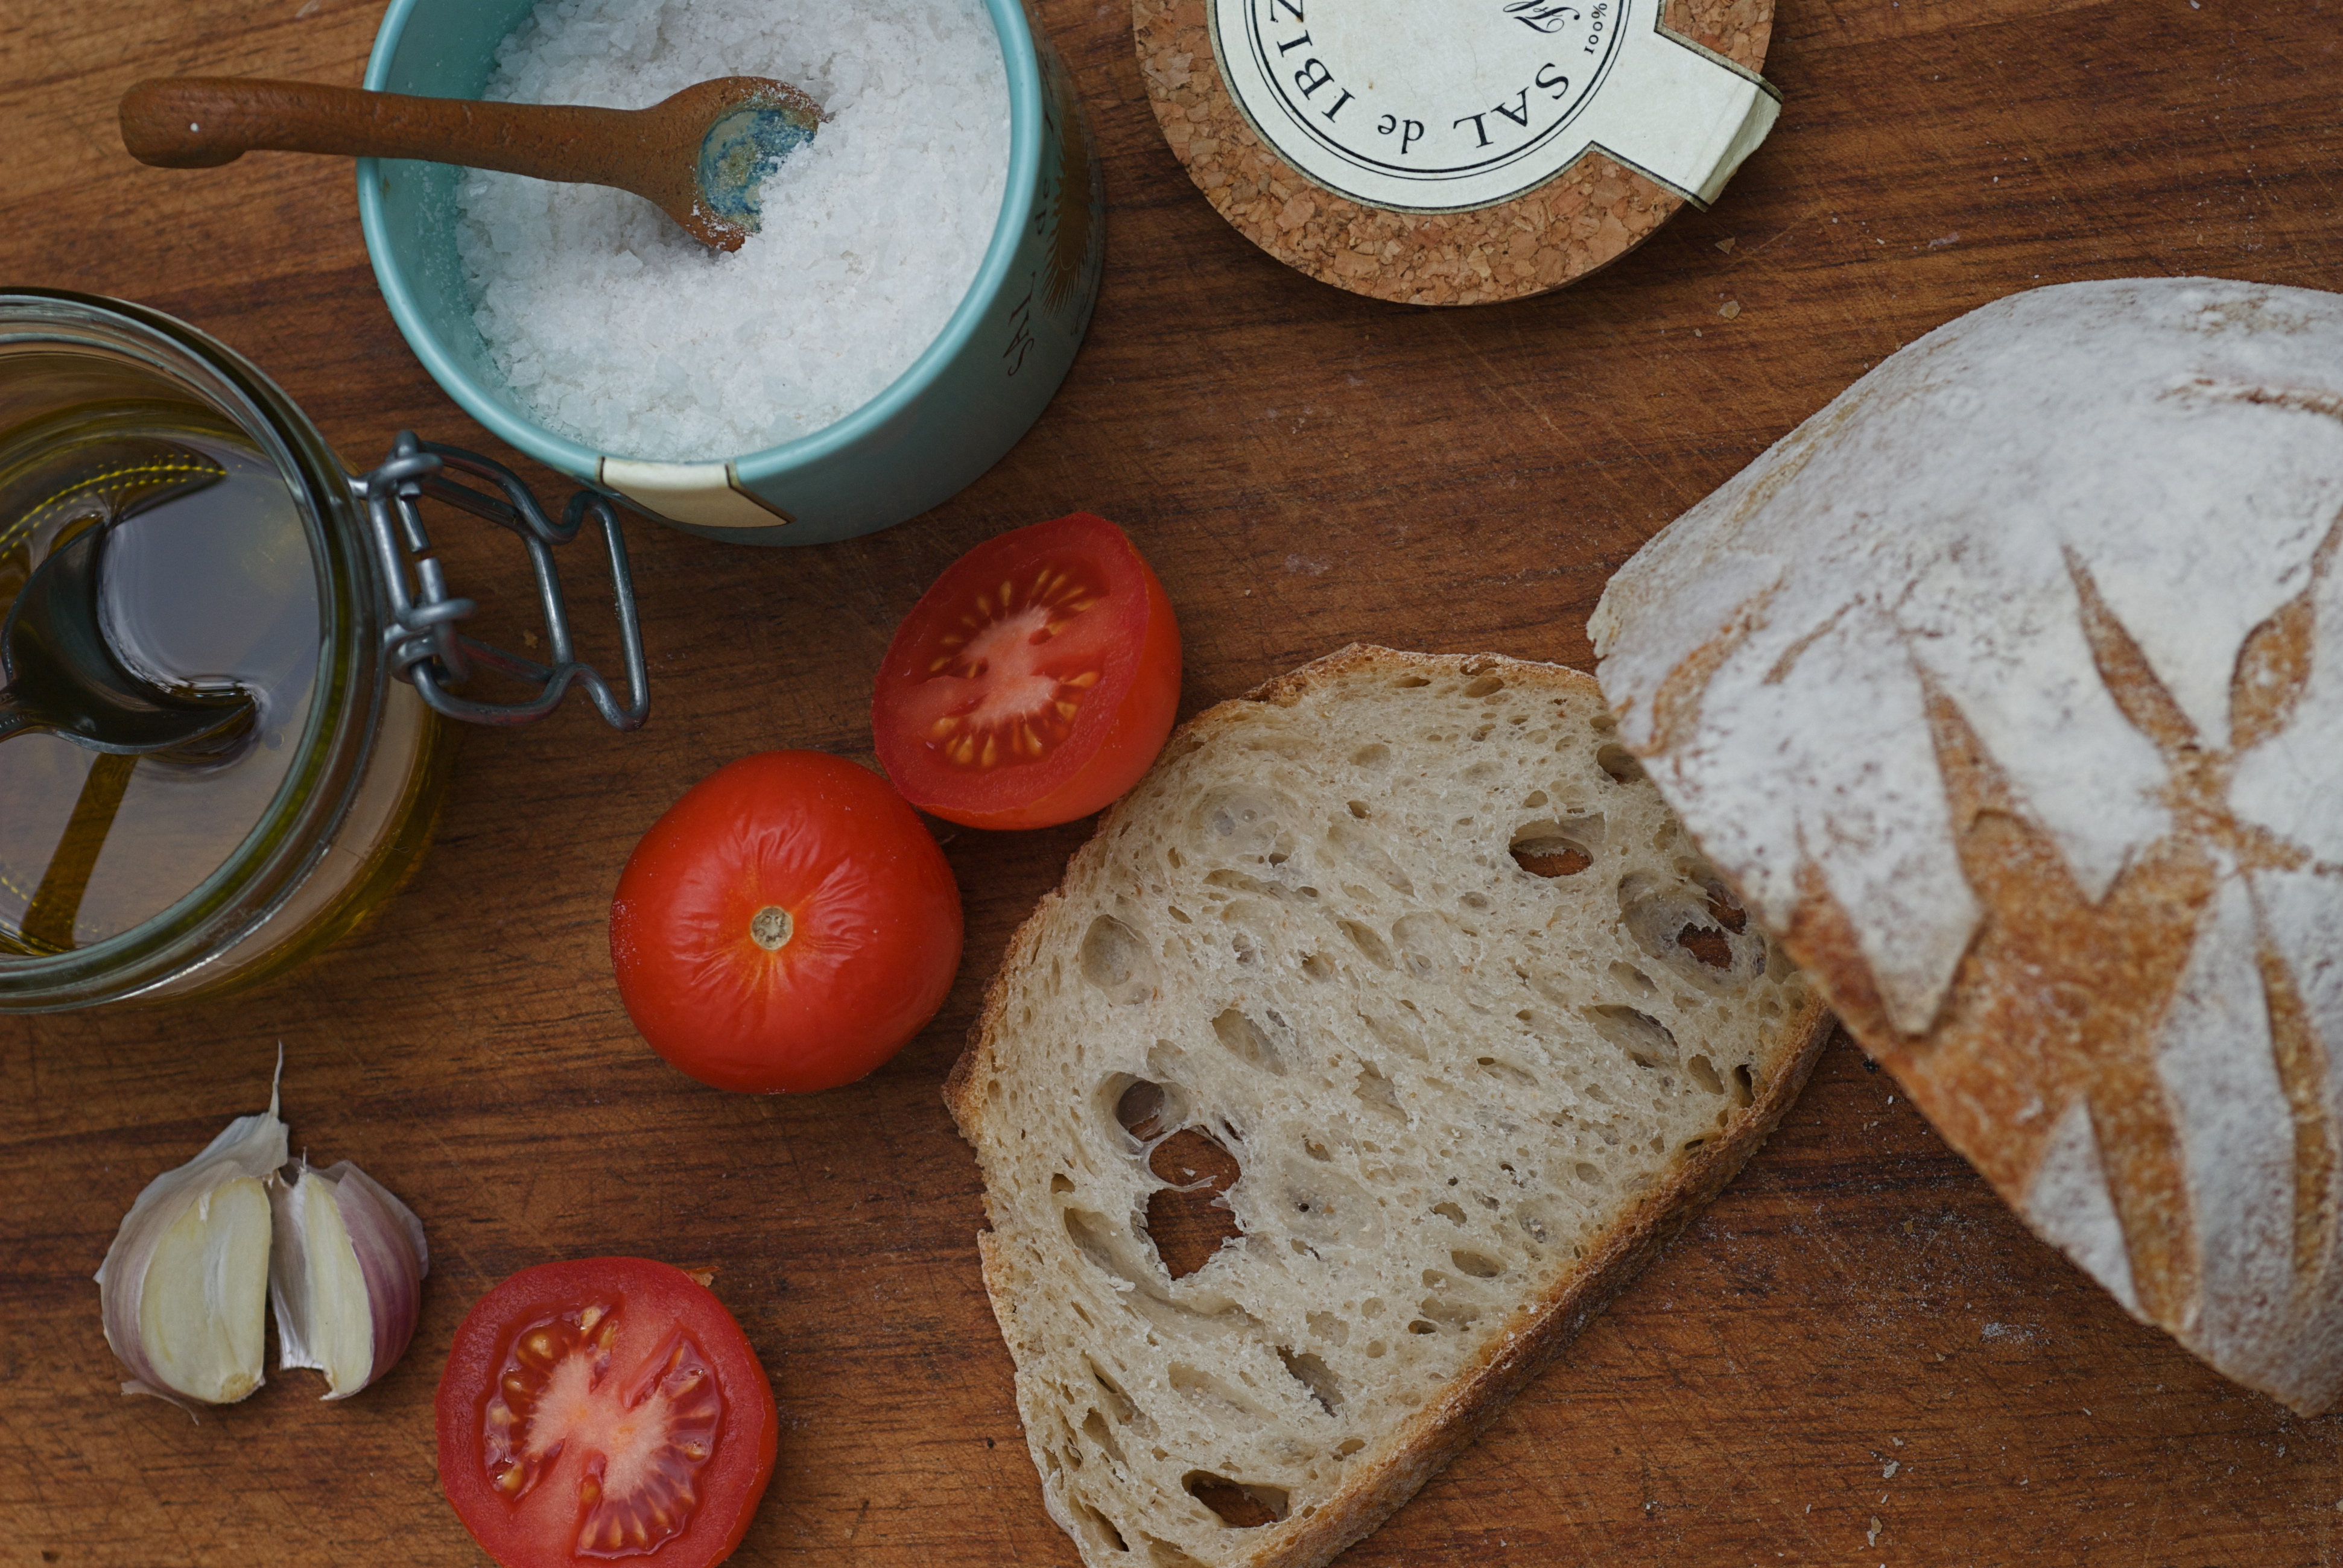
We’ve cooked dried yellow and green peas in comforting, wintery soups for centuries.  Whilst it’s possible to buy whole peas, split peas are much quicker and easier to cook, since they have lost their thick skins and don’t need any soaking. It may not be quite the season for it but pea and ham soup is a British classic (it’s other name London Particular harks back to the pea-souper fogs that used to engulf the capital) You will find my recipe here on The Borough Market website Split peas are a great store cupboard standby; they make wonderful dal  and Greek Fava purée too.

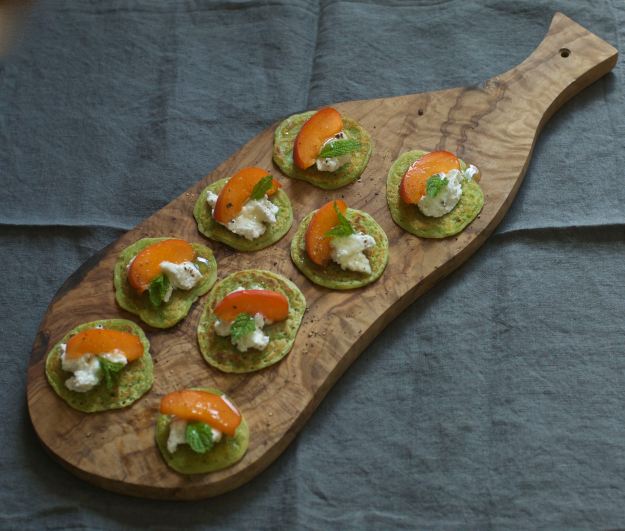
My latest discovery is green pea flour (quite literally ground, dried green peas). I’m happy to eat gluten, but for any of you cutting it out, this pea flour could be very handy. I’ve written about farinata (socca before) and this recipe is just a variation on the chickpea flour (gram flour) pancake eaten on the Mediterranean Rivieras. The colour is a glorious Kermit green and it tastes amazing too.

Pea Fritters with Ricotta and Honey

Pea fritters(makes about 16 individual or 2-3 larger pancakes)

100 g green pea flour
180 ml water
2 tbsp extra virgin olive oil
pinch of salt

1-2 tbsp olive oil for frying.

75 g ricotta cheese (I found some local, fresh goat’s milk ricotta)
a couple of tablespoons of delicate honey
black pepper
a few fresh mint leaves

Pour the pea flour into a jug and add about half the water. Stir until you have a thick , smooth paste and then add the remaining water, oil and salt. Leave to rest for at least an hour (for the starch to swell) – I’ve left it for a day too and it was fine.

Heat 1/2 tbsp oil in a frying pan until searing hot and then spoon in small pools of the mixture for individual pancakes or cover the pan with about 1 cm of mixture for a whole cake. Fry until set underneath but still slightly slimy on the top. Flip the small pancakes over with a palette knife or turn the large cake over on a large plate. Add a dash more oil and fry the underside.

Serve warm topped with ricotta, honey, black pepper and mint (and in this case a slice of fresh apricot)

Pea pancakes also make a marvellous savoury dish. Here are a couple of my instagram snaps of suppers past: pancakes topped with chicken, parmesan and lemon and then on another occasion with treacle lardons from Charcutierltd and a soft egg.

And some other peas………

If you read my blog at all you’re sure to have come across my favourite Black Badgers aka Carlin Peas – here’s the recipe for a super tasty (and just happens to be healthy )salad and in a few days time I’ll post the recipe for “Grey Peas” (not a particularly alluring name, I agree) that I cooked for the Radio 4 Food Programme.

And ....If you’re after pea flour Hodmedods sell it by mail order and in many health food shops, grocers etc. Someone did ask me the other day if I work for Hodmedods – the answer is no, thus far I’ve never written a sponsored blog of any kind. I just happen to love what Hodmedods do and sell.

Lastly a confession: as a Pulse Ambassador, I’m ashamed to admit that I just can’t get excited about marrowfat peas, even mushy peas have never really done it for me. Go on, do try to convert me. Nigella’s avocado and marrowfat pea purée is pretty good but I’d still rather eat guacamole.

The Radio 4 Food Programme about Pulses is no longer being broadcast this weekend (there was a reshuffle after a very fast turnaround programme last weekend about the Brexit effect on our food – really worth a listen on podcast) I’ll keep you updated. 


Warm Fava Hummus with Caramelised Pistachio Butter

DSC_1

Eating beans certainly doesn’t have to be all about calorie counting as this warm fava bean purée swirled with rich, nutty butter demonstrates. I cooked up the recipe at a recent workshop in London for The Guild of Food Writers and promised to post it.

British beans and peas are enjoying quite a renaissance at the moment thanks to Nick Saltmarsh and the rest of the team at Hodmedods. The fact is that we export vast quantities, thousands of tons in fact, of fava beans (dried broad beans) every year and they taste bloody good, are fantastically nutritious and really economical too. It seems rather fortuitous that we’re developing a taste for cheap, homegrown beans right at this moment, with the pound plunging ever downwards and us setting our country adrift into God knows where, we may well be needing some economical sustenance in the near future (that will be my first and last Brexit comment here otherwise I might just get into a rant).

The dish was inspired by a recipe in the new United Nations FAO cook book, Pulses: Nutritious Seeds for a Sustainable Future (the book can be downloaded here). Turkish chef Didem Senol gives a recipe for warm hummus (made with chickpeas as you would expect) and a hot spicy butter. Here’s a copy of the recipe….

DSC_2

My version used some split fava beans that cook up to a deliciously soft purée in about half an hour with no need for soaking at all. These split beans are great to add to curries and stews to thicken up the sauce (good for the gluten intolerant and also great for those like me who enjoy the creamy texture), they also make the most fabulous falafel. I liked the idea of the melted butter on top as, hoorah, we’re able to ladle on the fat again nowadays without an ounce of guilt (I feel so sorry for those who’ve been suffering margarine or low-fat spread for decades only to discover that it was all a waste of time). So, I was up for the melted butter but thought I’d really pull out all the stops by caramelising it too. If you’ve never tried this before you’ll be amazed; “beurre noisette” is heaven with fish (just add a few capers and a bit of parsley) and even better with pasta (add some sage leaves to crisp up as the butter browns).

Warm Fava Hummus with Caramelised Pistachio Butter

Makes 2 large bowls – ideal for sandwiches, salads, dipping and whatever else you usually do with hummus. The butter only really works with warm hummus, you could always zap it in the microwave just before serving.

250 g split fava beans
1 clove of garlic, crushed
Juice of 1/2 – 1 lemon
100 ml -ish extra virgin olive oil
Salt to taste

50 g unsalted butter
50 g roughly chopped pistachio nuts
Good pinch of Urfa chilli flakes (or any other sweet, slightly smoked chilli)

For the hummus
Take a small pan, cover the fava beans by a couple of centimetres of cold water and then place over a medium heat. Skim off the froth as the beans come up to the boil and then simmer until they begin to soften and collapse into the cooking liquid. Do add a little extra water if needed but only enough to keep the favas from drying out. The idea is to purée the beans and liquid to make the hummus but if they are very wet you could strain through a sieve.

Whizz up the beans with a blender, out board engine (aka handheld blender) or food processor and mix in the garlic, lemon juice, olive oil and salt to taste. You could, of course, serve this minus butter BUT please do give it a go, you may become hooked.

For the butter
Melt the butter in a small saucepan (ideally a steel rather than dark, non-stick pan so that you can watch the colour of the butter changing later).

Turn up the heat until the butter begins to froth and then use your nose; once you begin to get that gorgeous biscuity smell you need to be on your guard. Swirl the pan a little so that you can see what’s going on and once the little flecks of milk solids are turning a foxy red/brown it’s time to quickly tip the butter into a heatproof container to stop it from burning. Too pale and the butter will taste cloying and fatty, too dark and it will taste burnt (just like a sugar caramel).

Stir in the pistachios and  Urfa chilli flakes. Swirl the butter over the warm hummus and serve right away with toasted bread.

Split favas are available in many health food shops, deli’s and good grocers now and also online at Hodmedods

Urfa chilli flakes are available at plenty of good spice shops and delis and I found mine online at Sous Chef

DO listen to The Radio 4 Food Programme on 10th/11th July – it’s all about pulses.
Nick Saltmarsh of Hodmedod, Sanjay Kumar of The Cornish Sardine School and I had a wonderful time recording some of the programme with Sheila Dillon in Bristol last week.


Happy New Year …… of Pulses

2016 has been declared The International Year of Pulses by the United Nations Food and Agriculture Organisation; at last I have even more reason to shout about lentils, chickpeas and beans.

This year I plan to write at least one post a month about a different legume amongst all of my other ramblings. Being a champion of pulses doesn’t mean that I’m focused on dieting or totally obsessed with healthy eating (you’ll find a few indulgent dishes and cakes amongst the recipes on my blog) I just write about the ingredients and food that I like to eat.

Luckily the pulses, whole grains, nuts, fruits and vegetables that we regularly tuck into are incredibly good for us, it’s almost like a fortuitous accident. I’d better quickly add that I’m certainly not squeaky clean –  I happen to love pasta, smoked bacon, Stilton cheese and custard tarts amongst many other delights on the “nutrition guru’s” black list. It may sound very simplistic but, in my view, if your diet is predominantly made up of the unprocessed, slow-to-digest bits there simply isn’t room to fit in too much of the naughtier stuff.
Michael Pollan’s “Eat food. Not too much. Mostly plants.” pretty much sums it up.

You could call us a “flexitarian” household (just a poncey way of saying that we have plenty of meals that don’t include meat or fish). Husband Peter and 9 year old Imi don’t even seem to notice whether a meal is vegetarian or not, they’re just as happy eating a chickpea pilaff as a lamb stew, it’s about tasty food. This way of eating happens to be cheaper, means we can afford great quality meat when we do buy it and most importantly to me it’s exciting and varied (Oh, and another added bonus, it’s good for us and the planet too)

I did mean to give you a lentil recipe to celebrate New Year – the Italians believe that each little lentil represents a coin bringing prosperity for the year ahead (Yes, please). Here’s a fab’ rhubarb and lentil curry recipe in any case. It’s just not that often that I have a little film up my sleeve………….
So here’s a quick video of how to throw together some very simple dips to set your pulses racing (sorry that had to happen just once)  that I filmed a couple of weeks ago with Rob Wicks of Eat Pictures. You’ll find the recipes below.

Black Bean and Chipotle Dip

Makes 1 medium-sized  bowl
Chipotles are smoked jalapeno peppers, traditionally you buy them dried or in adobo, a spicy sauce made up predominantly of tomato and onion. You could easily substitute the Chipotle paste or ketchup  that is increasingly available in supermarkets too. No Chipotles at all ? A spoonful of smoked Spanish paprika and a few hot chillis will taste great too.

Here’s a Tex-Mex winner to serve alongside Guacamole, tomato salsa and a few corn chips. Crack open an ice cold bottled beer, slide in the wedge of lime and let the fiesta begin.

2 tbsp olive oil
1 onion, finely diced
3 cloves of garlic, finely diced
1 x 400 g tin of black beans or 250 g home cooked beans
2 chipotle chillis in adobo sauce, stalks removed
1 tsp ground cumin
2 tbsp soured cream
Juice of 1 -2  limes
1 tbsp freshly chopped coriander
salt and a few drops of tabasco to taste

Fry the onion in the oil until soft and golden. Now add the garlic to the pan and continue to cook until it smells wonderful.

Put the onion and garlic into a food processor with the beans, the cumin and just half of your Chipotle ( it’s always wise to tread carefully with any chilli). Whizz everything up and add the remaining chilli, soured cream, lime juice and salt by degrees until the dip is balanced.

Stir in most of the coriander, check the seasoning again and up the heat with a dash of Tabasco if you’re feeling fiery.
Serve with a swirl of soured cream and a sprinkling of coriander.

Roasted Pumpkin Hummus

Makes 1 medium-sized  bowl.
This makes a very welcome change from the more familiar hummus bi tahini. You could swap the pumpkin for other roasted vegetables too.

600 g peeled and roughly chopped pumpkin (or butternut squash)
2 tbsp olive oil
1 x 400 g tin or 300 g drained, cooked chick peas
2 cloves garlic, crushed
juice of 1 lemon
125ml extra virgin olive oil
salt and freshly ground black pepper

Toss the pumpkin in the olive oil and roast at 200 c/ 400 f/ Gas mark 6 for about 40 minutes

Place the chickpeas in a food processor with the garlic, lemon juice and roasted pumpkin. Blend for a moment or two before adding most of the olive oil. Now pulse the mixture, adding more oil and a little seasoning until you have a deliciously creamy paste.

Try adding :
a handful of chopped parsley or coriander
a couple of teaspoons of harissa, swirled through the top.

Cannellini and Beetroot dip

Makes 1 medium-sized  bowl
1 x 400 g/14 oz tin of cannellini, haricot or flageolet beans, drained
2 cloves garlic, roughly chopped
4 tbsp olive oil
juice of 1/2 a lemon
a pinch of salt and pepper

For the beetroot swirl
2 medium sized, cooked beetroots
2 sprigs of fresh dill
1-2 tsps of ground coriander
salt and pepper to taste

Whizz the beans, garlic, olive oil, lemon juice and seasoning into a purée in a food processor or with a stick blender and then adjust the seasoning until you are happy. The creamed beans will be subtle but need to be balanced all the same.

Purée the cooked beetroot with the dill and ground coriander. Balance with salt and pepper.

Swirl the beetroot into the bean dip but don’t stir to much, it’s more appetising as a ripple effect.

You’ll find lots more pulse recipes on the official Pulses.Org website  here  and plenty of other inspiration on my blog – just click on the relevant legume in the ingredients list to the right.

AND, JUST ONE MORE THING – on January 6th people will be eating pulses all over the world to raise awareness of their health and sustainability benefits – you can join the social media party here or you may just prefer to sit down quietly with your friends and a big bowl beans.

Happy New Year!

Roast Vegetable Hummus and the Simplest Flat Bread Ever

Okay, it’s been a while and sadly I’m not about to regale you with fabulous tales of holidays and adventures that have filled my days. It’s just that Peter (the husband) is away in Antarctica for a few weeks and my life seems to be a hectic (read chaotic) combination of working all over the place at funny hours (a result of being freelance that I usually embrace) and farming Imi out to wonderfully supportive family, friends and neighbours (three cheers for “Spare Granny” Sasha) at both ends of the day.

The amazingly bright autumn weather (not today – the S.A.D. lamp is definitely on), a few trips to The Bristol Lido to swim outside and some very special one-to-one time with Imi have thankfully made the chaos pretty wonderful too. I feel so blessed living in Bristol where I took these pictures just 5 minutes walk from the house. Last Sunday, the 1st of November, just felt like a bonus, an almost summery day, before we hit the colder weather – everyone was out (and I remembered that I really, really need a dog).

One of my Autumn highlights has to be the day spent at Victoria Park Primary School, in Bristol, helping with their Healthy Schools Week. I was working with Ramona Andrews: a school Mum, food writer, social media guru, producer (she’s a talented lass) and we a ball (a tiring one, but oh so rewarding). The idea was to get kids cooking, tasting and experimenting with simple recipes that happened to be healthy too, rather than the didactic approach.

With over 30 kids at a time, in the school art room, it wasn’t going to be individual soufflés so we settled on flat breads and hummus. It was all about tasty, simple and accessible recipes that the kids would most likely eat too and with Halloween looming we thought we’d throw some roasted pumpkin into the hummus. The room was filled with great wafts of garlic, cumin, baking bread and lots of noise (good noise, enthusiastic, excited noise).

One thing that I’ve learnt about cooking with children is that everyone wants, and needs, to be busy for every available second (I so, so appreciate you school teachers – it’s knackering). We had plenty of grating going on to keep everyone gainfully employed and made a massive bowl of salad. Radishes, beetroot, carrots, cucumber, apples, pears, seeds, herbs, lemon zest – it all went in, and of course there were a few doubters (some rather more vociferous than others) but pretty much everybody tried the end result and, best of all, most of them loved it.

So here you have my recipes from the day and though I do admit to buying hummus sometimes, and pitta bread too, this reminded me how simple, cheap and adaptable they are to make. The children were amazed at how easy it is to prepare the basic flat breads with plenty of scope to play around sprinkling with different spices They’re ideal for baking with some eager little helpers but worth throwing some together for yourself too.

Halloween may be over, pumpkin fever a thing of the past, but there are plenty of squash around in the markets and shops to experiment with. The texture is fabulous in hummus and the slightly nutty, caramelised flavour works well with Middle Eastern spicing or you could try some rosemary instead. The children devoured this, one even suggested that it would be good for “dipping KFC chips in”! (you can’t win ’em all) but the best thing was the palpable excitement  at eating something they’d prepared.

image

Hummus

1 x 400 g can of chickpeas, drained
1 clove garlic, crushed
1 tsp ground cumin (roast and grind your own if you have time)
juice of 1/2 -1 lemon
4 tbsp extra virgin olive oil
A pinch of salt and ground black pepper

Whizz up the the chickpeas in a food processor with the garlic, the juice of 1/2 the lemon and most of the cumin.

Blend for a moment or two before adding the olive oil. If the hummus is very stiff you can add 1-2 tablespoons of water. Blend again until you have a nicely textured, rather than smooth, paste.

Season with the black pepper. Have a taste and decide whether you want to add more lemon juice.

Coriander or parsley are great stirred in at the last moment (no earlier or your hummus will look a murky khaki colour.

Roasted Vegetable Hummus

600 g carrots or pumpkin, peeled and roughly chopped
2 tbsp olive oil
pinch of salt
1 x hummus recipe above

Pre heat the oven to 200ºC, fan oven 180ºC, gas mark 6

Put the carrot or pumpkin pieces into a roasting tin and add the olive oil, tossing to coat the vegetables and sprinkling with a little salt. Roast in the oven for 30 minutes, or until they’re beginning to brown and caramelise.

Add the vegetables (hot or cold, it doesn’t matter) to the food processor  (or whizz with a stick blender), purée until smooth and then stir in the hummus.

Tip: Try using other vegetables such as roasted peppers, onions or aubergines too.

Simple Flat Breads (12)

250 g self raising wholemeal flour
pinch of salt
1 tsp baking powder
250 g natural yoghurt

Just mix everything together in a large bowl, stirring with a wooden spoon.

Squash the dough around in the bowl with your hands until it feels smooth and then roll the ball in a little four to stop it sticking the bowl. Cover the bowl with a plate or tea towel for at least 20 minutes

Divide the dough into 10 (easiest to chop in half and then cut the halves into 5 each- get the Maths going) Roll out until they are the thickness of a pound coin and bake in the hottest oven possible or cook on a ridged griddle until baked through..

Brush with oil and herbs ( try za’atar : sumac, sesame, tried thyme and salt) or garlic butter and eat straight away.

Grated Fruit and Vegetable Salad

You don’t need a recipe really but here are a few suggestions – a great moment to empty the veg’ basket and fruit bowl. It’s a fab’ way to introduce new flavours to kids, pile in plenty of the familiar and then just a little of something new.

Dressing made with lemon juice, olive oil and seasoning1 apple/pear
1 beetroot red or golden or even candy-striped (the kids loved these)
2 carrots
1 -2 sticks of celery
Fresh herbs such as parsley, mint, dill or coriander.

Put your dressing into a bowl and grate the r fruit and vegetables into it (turning so that they don’t get a chance to brown)
Mix everything together ( it’s best to stir in beetroot at the very end or you will end up with a Barbie-pink salad – you may want to wear gloves whilst you are grating).

Taste and season , then add nuts, seeds, herbs whatever you fancy.


Sundal Accra – A Bonus Spicy Chickpea Recipe!

OOPs I did it again! In the carefully selected words of Imi’s favourite Britney Spear”s number.

I can just about write one blog but managing to write two is almost beyond me. I decided to set one up for our wedding guests and have, for the second time, managed to post some completely irrelevant information to hundreds of food followers and chickpea enthusiasts- Sorry if you’re bewildered – I’ve taken it down now and you have a very quick post in it’s place!

So it’s not all bad since I’m going to reward you with one of my favourite recipes from Pulse (Oh and what a fine excuse to mention my book once more)

Pulse Jenny Chandler

Southern Indian Chickpeas and Coconut
Sundal Accra

There are so many amazing Indian snacks made with pulses to choose from, it was the pure simplicity of these chickpeas that caught my eye. Then, once eaten never forgotten, they make a great little nibble to serve before a curry.

This snack is traditionally served outside the temples of Southern India during the Hindu festival of Navratri. Nowadays it’s tricky tracking down whole coconuts in Britain but you’ll certainly know what to do next time you score on the coconut shy at the local fête. I’ve used desicated coconut but if you do find a fresh one in an ethnic store it is oh so much tastier.

1 tsp vegetable oil such as rapeseed, sunflower, ground nut or coconut oil
1 tsp black mustard seeds
1 green chilli, very finely diced
1 tsp fresh ginger, very finely chopped
5 curry leaves (optional)
1/2 tsp salt
1 tbsp urad dal or very unorthodox red lentils (optional)
250 g home-cooked or 1 x 400g tin, drained and rinsed chickpeas
4 tbsp freshly grated coconut or 2 tbsp unsweetened desiccated coconut

A handful of fresh coriander, finely chopped

Take a large frying pan and heat up the oil, add the mustard seeds and wait until they begin to splutter and pop about.

Now throw in the chilli, ginger, garlic, curry leaves, salt and raw dal (or lentils) if using.

Wait for the aromas to burst out of the pan and the dal/lentils to begin crisping up and then stir in the chickpeas.

Remove from the heat and stir well, add the grated coconut and dive in.

Scrumptious warm or cold.

My Chickpea Love Affair and Perfect Hummus

Not all chickpeas are created equal

Chickpeas are perhaps my number one base ingredient, although they’re not often the star player in my favourite curries, salads and soups they add an earthy, nutty creaminess that I just can’t get enough of. There’s also the fantastic chickpea flour or “gram” flour that I use for making farinata and the odd bhaji – it’s ludicrously cheap, easy to use and great for all the gluten-free clan. Then a couple of weeks ago I came across frozen green chickpeas in one of  my favourite shops,  Sweetmart in Bristol.

I turned my “fresh” chickpeas into simple lunch with potatoes, spices and plenty of fresh coriander. I do admit that I got a bit taken in by the lush green peas on the packet- they were more khaki in reality and didn’t look that appetising, also the texture was a bit more mealy than I was expecting. All in all,  I have to be honest, I was rather disappointed – it seems to me that the chickpea, like so many things in life, benefits from a bit of ageing.

So, back to the dried chickpea (and it becomes more and more apparent that you really do get what you pay for – a can of supermarket chickpeas will be fine, but never sublime). The Spanish are serious legume lovers and have all sorts of different chickpea varieties on offer, whereas most of us Brit’s mistakenly think a chickpea is just a chickpea. I’d never seen a growing chickpea before spending some time in the beautiful Sierra de Francia, near Salamanca in Spain. The locals harvested their own crop and then had them drying out on mats in the street. I’ve thrown in a few gratuitous pic’s from Miranda del Castañar and the surrounding villages -it’s such a glorious part of Spain. You’re in Ibérico ham, cherry and legume land.

The caviar of chickpeas is , as far as I’m concerned,, the humungous blanco lechoso (the “milky white”) which has a fabulous sweet flavour and velvety texture. This is the perfect chickpea for making hummus – there must be equally delicious  Middle Eastern equivalents available out there  but I’ve yet to find them. Tinned chickpeas always seem to give a grainy textured hummus whereas these are silky smooth once puréed. My chickpeas are from a Spanish producer called Burcol and I tracked them down in the fabulous Papadeli in Bristol

I  doubt that you’ll be needing a hummus recipe but just in case here’s one from my book Pulse.

Perfect Hummus - Jenny Chandler


Hummus Bi Tahini

300 g/10 oz home- cooked chick peas or 1 x 400 g/ 14 oz tin of well rinsed chick peas
juice of 2 lemons
2 cloves of garlic, crushed
4-6 tbsp tahini paste
salt and black pepper or cayenne pepper
2 tbsp extra virgin olive oil

Place most of the chick peas (keeping a few aside for the traditional garnish) in a food processor with the lemon juice and garlic. Give the tahini a good stir and then add 4 tbsp along with 2 tbsp of water (preferably the cooking water if they are home cooked),

Blend until the mixture is really smooth and then add more water to thin it down if necessary. Season. You will need some salt, you can zip the dish up with cayenne or just use black pepper; to enrich the purée , add more tahini; or lift the purée with more lemon juice.

Serve in a wide bowl. Swirl extra virgin olive oil over the surface of the hummus. Sprinkle over the reserved chickpeas.

Try garnishing with:
Pomegranate seeds and coriander
Toasted pine kernels and long, slow-cooked caramelised onions

As always I’ve cooked up a large pot and plan to use the rest of the chickpeas in a salad tomorrow with left over roast chicken, roast pumpkin, rosemary, salad leaves and plenty of parmesan. The rest of the pot will probably be made into soup – I’ll give you the recipe v. soon, it’s sooo quick…. chicken stock from the carcass, lots of garlic, mint and chilli peppers and chickpeas of course.

AND For those of you in The West Country…. ……….It’s only a couple of weeks until the 2nd Bristol Food Connections festival – take a look at what’s on

1428593255086 On May 2nd Lou Marchionne and I will be giving a Pulse demo at the Better Food Company  as part of the Bristol Food Connections Festival. It’s all about how to enjoy plenty of legumes in your diet, the health benefits and the tasty factor too. It’s a freebie – do come along – you can book tickets here

I’ll also be joining a panel of illustrious writers, earlier in the day at
The Business of Pleasure – Stem Rooms, At-Bristol, Anchor Road, Harbourside, Bristol
12.30 – 1.30: How to be a food writer/blogger: making your way in these parlous days of publishing, and how to diversify to best use your skills. With Xanthe Clay, Fiona Beckett, Claire Thomson, Sarah Lavelle, Jenny Chandler and Martin Booth. You can book here 


Empanada and Jazz in the School Hall

It’s about time that I got back to my blog- I know, weeks of inexcusable silence. Well, it’s been a momentous month: I hit 50, Peter and I got engaged (after just 14 years) and I’ve got a new book on the go. I’ve stored up all sorts of stuff that I really will get down to writing about but thought I’d flash this one off. Here’s the empanada recipe that I cooked, amongst other tasty bits, at the P.T.A fundraiser at our daughter Imi’s  primary school – Hotwells (just a quick hike down, and decidedly buttock-firming climb back up, Granby Hill) in Bristol.

The very enthusiastic Mr Bassett, A.K.A. Peter/Manuel, was my tapas assistant and sidekick – (there was a Fanny and Johnny-esque tone to the demo and now I’m convinced that all the school parents think I’m a bossy old bag -it was all put on of course!) The evening’s entertainment went from the ridiculous to the sublime with another Mum, the super-talented Kate Dimbleby, singing some jazzy numbers including a couple from her latest show and album Beware of Young Girls (Go on have a click and a listen), The Dory Previn Story,  that she just happens to be taking to New York this Christmas.

But now to the empanada which went down a treat – the recipe came from a small restaurant just outside the town of Goian in Galicia. My search for the perfect empanada had been a long one, I felt like I was a million miles from home, gazing across the Minho river at Portugal and then suddenly Fernando the owner/chef started regaling me with tales from his days as a waiter at Thornbury Castle (just a few miles from Bristol) when Fanny Craddock parked her Rolls on the croquet lawn (oh yes we’re back to Fanny again!). It was all quite surreal .. but I must now get to the point and give you that recipe

Empanada
Galician Flat Pie

The Crust
20 g/ ¾ oz fresh yeast or 1 tsp dried
350 g/12 oz strong white flour
125 g/4 ½ oz corn meal, masa harina or finely ground polenta
½ tbsp salt
50 ml/2 fl oz white wine
100 ml/3 ½ fl oz olive oil
50 g/2 oz lard, chopped into 1 cm/ ½ inch dice (you could use vegetable fat instead)
1 egg, lightly beaten

Another egg lightly beaten, to seal and glaze.

Mix the yeast up with about 3 tablespoons of blood temperature water until you have a creamy paste.

Now put the flour, cornmeal, salt, wine, oil, lard, egg and yeast in a large bowl and begin to stir everything together. You can get your hands in pretty quickly and bring the dough together. It should feel soft and quite sticky, if there is any dry flour left in the bowl then add a splash more water. You will have a job to roll the dough out thinly later if it is too dry.

Work the dough, squashing and rolling for a couple of minutes until well combined and smooth. It will feel somewhere between a pasta and a bread dough. Place it back in the bowl and cover with a clean tea towel and leave to rise for at least an hour or until it has risen a little.

Meanwhile make your filling
Tuna filling – Relleno de atún

150 ml/ ¼ pint olive oil
4 onions, sliced finely
1 red pepper, sliced finely
1 green pepper, sliced finely
2 tsp sweet smoked paprika
1x 170 g/5 oz can tuna in olive oil
4 tbsp tomato puree
salt to taste
3 boiled eggs, sliced (optional)

Fry the onion until soft and golden and then add the peppers. You really should take your time on this -the longer and more gently you fry this base the sweeter and more delicious the result.

Sprinkle in the paprika and stir in the tuna and tomato puree, cooking for another couple of minutes. Season with salt to taste. Just remember to slightly over season the filling – you might want a dash of vinegar and even a sprinkle of hot paprika too (the filling will be surrounded by the more neutral crust)

Lay the slices of egg on top of the filling in the empanada before adding the lid.

Now for the Assembly

Pre-heat the oven to 200°C /400°F /Gas mark 6.

Back to the crust. Roll out half the dough to a 5 mm/ ¼ inch thickness to fit your baking sheet or Swiss roll tin. Grease the baking sheet and lay the dough on top.

Now pile on the filling, spreading it evenly, leaving a 2cm/1 inch margin around the edge. Include all the deliciously oily juices too

Brush the edge with a little beaten egg – this is your glue so do beware not to drip it down the sides of the dough or it will be welded to the tin when it comes to serving.

Roll the rest of the dough to the same size and lay it over the filling. Now crimp the edges together, twisting over the dough to form a rope-like edge – like a Cornish pasty.

Brush the entire empanada with beaten egg and, using a fork, pierce the top with dozens of holes ( or you’ll end up with the London dome effect and then a large split).

Leave to rest for 10 minutes and then bake in the hot oven for 20 – 30 minutes, until the crust is nicely browned.

Fillings can vary enormously but just think of the onion, pepper, paprika and tomato as the base and then add cooked chorizo, pork loin, octopus, salt cod and raisins, black pudding with pine kernels or whatever else takes your fancy.

You’ll find recipes for pork and chorizo or octopus empanadas in my book – The Real Taste of Spain- available from the Hotwell’s School office (if you happen to be a parent) or from good bookshops and from Amazon too

Jenny Chandler- The Real Taste of Spain

And just another little picture for you – I visited a bakery in Santiago de Compostela where everyone took their own fillings into the baker who made up the empanadas with his own fabulous dough, initials were marked in the crust and then baked at dawn ready for a simple lunch or snack to be picked up first thing in the morning.

Farinata and The Folk House

A couple of weeks ago Lou Marchionne and I had a great evening “Spilling The Beans” about the delicious and nutritious versatility of legumes at The Folk House Cafe in Bristol. We got things rolling with a nibble of freshly cooked rosemary farinata and many of you who came along loved it so much that I promised to share the recipe from my book (Pulse).

Farinata’s a flatbread/pancake (also known as cecina, torta de ceci or socca – depending on where you come from) made from chickpea flour. It’s a speciality of the French and Italian Rivieras that I first came across in the trattorias of Chiavari back in my yachty days. Farinata makes the perfect lunchtime snack and it’s obviously a fabulous choice for all the gluten -free/wheat-free brigade.

This morning I popped into  The Better Food Company in Clifton to pick up the chickpea flour, or gram flour as it’s often known, so that I could prepare and photograph the recipe for you. … Yippee, there was Lou behind the deli counter just setting out some of her freshly made farinata,  it was meant to be! So, you have a pic’ of Lou’s cooking instead of mine. May it entice you into either of the fabulous local Bristol joints where she works her culinary magic, the afore mentioned Better Food Company or The Folk House Cafe.

Chickpea Flatbread or Farinata
Serves 4-6

200 g/ 7 oz chickpea flour (gram flour, besan)
1/2 tbsp finely chopped rosemary (optional)
1 tsp salt
400 ml/ 14 fl oz  water
3 tbsp extra virgin olive oil
plenty of freshly ground black pepper.

Tip the chickpea flour, salt and rosemary into a large bowl and slowly whisk in the water until you have a loose, lump-free batter. Rest the batter for at least an hour and up to 12 (strict timing instructions vary from town to town in Italy, with disasterous consequences if not adhered to, although I’ve noticed little difference in the results)

Preheat the oven to 220 C/425 F/Gas mark 7

Take a large flat tin or oven-proof frying pan ( the professionals have a huge round pan specifically for the purpose) and heat it up in the oven or on the hob.

Skim off any froth from the top of the batter and then stir in most of the olive oil.

Add the remaining oil to the hot pan, swirling it to create a non stick surface. Now tip in the batter to a depth of about 1 cm/just under 1/2 an inch and place in the oven.

Bake for about 15 to 20 minutes  or until the surface of the farinata is crisp and bubbling. I also give mine a quick blast under the grill for some extra colour.

Give it a few turns of the pepper mill, slice up with a pizza cutter and serve right away.

To make unorthodox individual servings: Fry off the batter (still about a centimetre thick) in a small crepe or omelette pan, turning it, just as you would a pancake. Once the farinata is set slip it onto a greased oven tray. Repeat the process with the remaining batter, layering greaseproof between each flatbread and then place the tray in the oven for about 5 minutes before serving.

How about serving with?
Fried onions and Gorgonzola cheese,
Mozzarella with tomatoes and basil,
or Taleggio with ProsciuttoFarinata recipe Pulse

And, for locals or visitors to Bristol…

Just a word about The Folk House which is one of those quintessentially Bristolian institutions that makes ours THE best city to live in. Tucked away down an alley at the bottom of Park Street it’s easy to forget that it’s there. The cafe is amazing, serving freshly-made, ethically sourced lunches – it’s restaurant food at cafe prices, I really can’t recommend it too highly. There is, of course, plenty of live music primarily but not exclusively of the folky kind and then there are the adult education courses. Where else could you sign up for classes from such an eclectic line up?  There’s everything from pottery to poetry, hula hooping to laughter yoga or succeeding at Suduko.

I have to admit that I’ve only done one course so far, a textile workshop where I designed some rather garish, shiny bits of fabric. One piece turned into a Barbie ballgown the other is languishing in my “things to mend and make” pile (it may be there for a while). I’m saving The Folk House up for when Imi leaves home or I somehow manage to transform my lifestyle and create some time.  I’m almost looking forward to getting old enough to retire so that I can sign up for the Wine Tasting, Indian Fusion Belly Dancing and Botanical Painting. I might just squeeze in a lampshade workshop in the meantime.

I hope you enjoy the farinata, Oh and I forgot to mention –  Lou says that eating lots of  rosemary is very good for the memory.

Rillettes and Hellebores

The hellebores are flowering outside the kitchen window, they seem to arrive in the nick of time every year just before I’ve decided that I really have to emigrate.

I know it’s a bit early to be celebrating but, after the wettest winter since British records began,  the sun shone all day yesterday.  There’s a huge damp patch on the sitting room ceiling but at least the relentless dripping has stopped and with the unbelievable sight of thousands of flooded homes every time I switch on the news, I really can’t complain. Meanwhile, Pete has been “working hard” on a whale watching trip in sunny Baja California, leaving me and Imi to batten down the hatches alone.

I’m always much more productive when Pete’s away, I sometimes even get out the sewing machine of an evening, there’s no one to offer me an Aperol Spritz (my current tipple) and more time to hatch domestic plans. So this month I’ve been on a preserving roll. I started off with marmalade but, since the Seville Oranges have pretty much been and gone, I won’t ramble on about that now (you can look at my Borough Market post in any case). My other endeavour has been to make the perfect rillettes.

When I teach bread classes at The Bertinet Kitchen in Bath there’s always a fabulous spread of cheese, salads and pots of homemade goodies for lunch (along with plenty of bread, of course). I always make a beeline for the jar of rillettes. Okay, consumed on a daily basis this fatty, pork pâté-ish mix would be recipe for a heart attack, but relished from time to time with some cornichons and plenty of salad it’s perfectly healthy and tastes superb.

Making rillettes at home is surprisingly simple, the only draw back when it comes to the traditional French technique (used by Richard Bertinet of course) is the quantity of fat. It’s not that I’ve got a problem from the calorie aspect, it’s just that most of us Brits don’t have large pots of goose or duck fat lurking around the house to cook the pork in. Nigel Slater uses no extra fat at all in his recipe- just slow roasts some really fatty belly meat by itself, I can’t ever seem to get my hands on any sufficiently fatty belly. So here’s my recipe which does use a few tablespoons of duck or goose fat, you’ll find it at plenty of butchers and supermarkets.

The pork must obviously be the best you can find. I would never dream of buying meat from a factory-farmed pig in any case, but here the distinctive flavour of slow-reared, free range pork is key. The beauty of the dish is that pork belly is cheap cut anyway and that the rich rillettes will go a very long way. My pork came from Sheepdrove, the organic butchers in Lower Redland Rd.

The recipe will make about 4 jam jars or 2 good size kilner jars.  So here you go:  It’s really just a question of assembling all your ingredients and then cooking them long and slow until everything simply falls apart.

Rillettes – 2 large jars

1 kg pork belly – bones and skin removed but ALL fat left on
1 heaped tsp of salt
2 bay leaves
8 juniper berries, lightly crushed
12 peppercorns, lightly crushed
2 sprigs of thyme
4 whole, peeled cloves of garlic
250 ml white wine
4-5 tbsp good lard, goose or duck fat (depending on how fatty your pork is)

Cut the pork into chunks (about 2-3 cm ) and then put all the ingredients into large ovenproof dish and cover with a lid. I covered the meat with a layer of greaseproof paper too as my lid was not that good a fit.  Place in the oven for 3 – 3 1/2 hours at 150 c °/ Gas 2 until really tender.

Lift the meat out from the juices and shred it with 2 forks. Squash the garlic cloves and add to the mix too.

Have a taste to check the seasoning  and add more salt and pepper if necessary.

Press the meat down into jars or pots and then, using a sieve, strain over the fatty juices from the pan.

If you are wanting to keep your rillettes for any time (and that’s the general idea, rather like duck confit) then use sterilised jars, press down the meat and juices to expell any air, melt some more goose or duck fat and tip over a thick layer to protect the meat. Keep up to 2 months in the fridge.

Serve at room temperature with sour dough toast or fresh baguette and some cornichons, pickled peppers, radishes  or any other zippy ingredients that take your fancy.

Rillettes for lunchNigel loves his rillettes with a baked potato, I stirred some into hot Puy lentils with plenty of parsley and red onion the other day and I’m also planning on stuffing some Piquillo peppers.

I needn’t have bothered with the sterilised jars, my rillettes aren’t going to be hanging around for long.

Pan Con Tomate

Pa amb TomaquetThis morning there were two rather soft, slightly wrinkly tomatoes lurking in the fruit bowl, they had pan con tomate written all over them. Why put tomatoes in the fridge? So many shop-bought tomatoes are like bullets anyway and even the most unpromising, cotton -wooly specimens can only improve with a couple of days maturing on the side in the kitchen. If you do happen to forget them for a few days, and they’re past the firm tomato salad stage then they’ll be perfect for squashing on some good toast; the Catalan answer to bread and butter.

I ate my first toasted bread, rubbed with garlic, tomato and then doused with wonderful olive oil, as a child in Ibiza. My memories of the tiny Balearic Island are a million miles from the wild nightclubs that most people that most people think of. My grandparents moved there in the ’60’s and my sister, Libbus, and I spent holidays trudging down the dirt track through the pines to the beach, visiting hippi markets, eating the best peaches in the world, watching geckos and getting sunstroke (thankfully just the once). This month we finally said good bye to Ibiza Gran, who had reached the incredible age of 100. She was a legend: worldly-wise, fabulously outspoken, with a superbly exotic wardrobe (that used to fill me with dread as a teenager) and an unmatched talent for “Spanglish”. As we sat down on the beach at her favourite restaurant Ses Boques (below Es Cubells) I just had to dive into a plate of gambas a la plancha and some pan con tomate with a glass of vino rosado, to toast her on her way. Gran would have been tucking into the alioli too (the feistily pungent garlic emulsion served with bread); she always maintained that garlic was key to good health and long life.

But back to the business of the bread and tomato. It is quite simply one of the very most surprisingly delicious things to do with a tomato and so, so much better than just slicing it onto a piece of bruschetta.

You will need, per person:
A couple of slices of country, rustic or sourdough bread
1 clove of garlic, sliced in half lengthwise
1 very ripe tomato, cut in half equatorially
A dash of extra virgin olive oil
A good pinch of salt

DSC_7725

The bread is great toasted on a ridged griddle, or better still on a toasting fork over an open fire, but an everyday toaster will do the trick too. It’s definitely not the moment for brown or granary bread, most Spaniards still think that you must have some distressing health problem to even consider eating the stuff but, more to the point, it doesn’t work as well here.

Rub the toast with the cut side of the garlic clove, it’s amazing how much flavour the bread soaks up.

Now squeeze the tomato directly onto the bread, you want as much of the soft flesh as possible, the skin gets thrown out. You can grate the tomato half at a time and you’ll be left with the just the skin in your fingers, it’s a restaurant trick, but I always prefer to squash and squeeze my own.

Drizzle with some delicious extra virgin olive oil (I love the Spanish oils extracted from the tiny Arbequina olives) and sprinkle with a pinch of salt. Dive in whilst it’s warm.

Pan con Tomate makes a great snack alongside other Tapasy bits like tortilla, calamares or fried artichokes. You could have some, D.I.Y. style, at your next barbeque or you could indulge, as I did, with some sublime Ibérico ham.DSC_7728

And here’s just a glimpse of idyllic Ibiza, for those of you who might think that it’s all about  sweaty DJs, pedalos and cheap sangria. OOh I could do with a bit of that right now.